- Logon to the Windows 2003 server running IIS 6.0 as Administrator.
- Select Administrative Tools
- Start Internet Services Manager
- Navigate to the Web site that has the digital certificate installed.
- Right click and select Properties from the menu.
- Open the Directory Security panel by right clicking on the Directory Security tab.
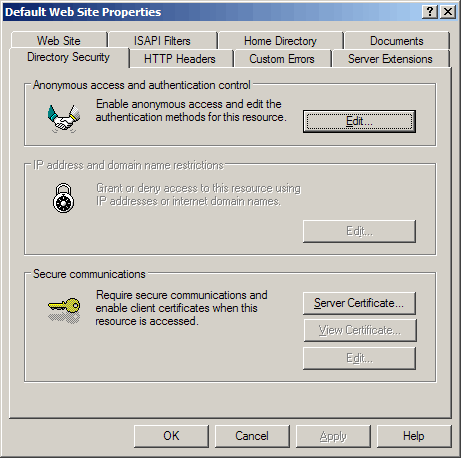
- Click on the Server Certificate... button near the bottom.
- The IIS Certificate Wizard will appear.
- Click Next.
- The following window will appear.
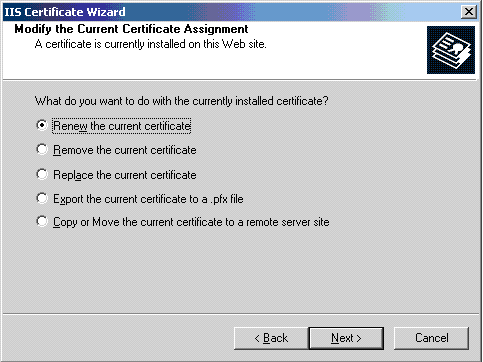
- If this exact page does not appear, STOP.
- This may be because:
- The digital certificate is not installed.
- The wrong Web site was chosen.
- Install the digital certificate before proceeding further.
- Choose the Export the current certificate to a .pfx file radio button.
- Click Next.
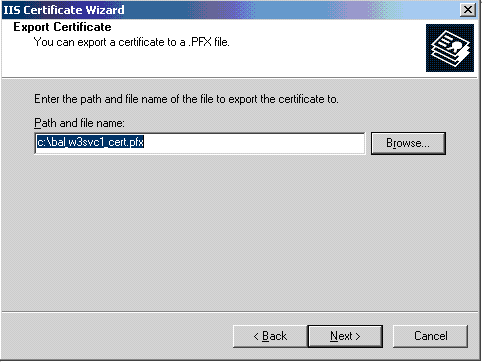
- In the Path and file name: field enter the folder and name of the
.pfxfile. - Use the Browse... button to avoid typing mistakes.
- Click Next.
- Go to the ISA Server 2004 firewall.
- Copy the certicate over to the ISA Server 2004 firewall machine.
- Select Start then click on Run....
- Type in mmc.
- An empty Microsoft Management Console should appear.
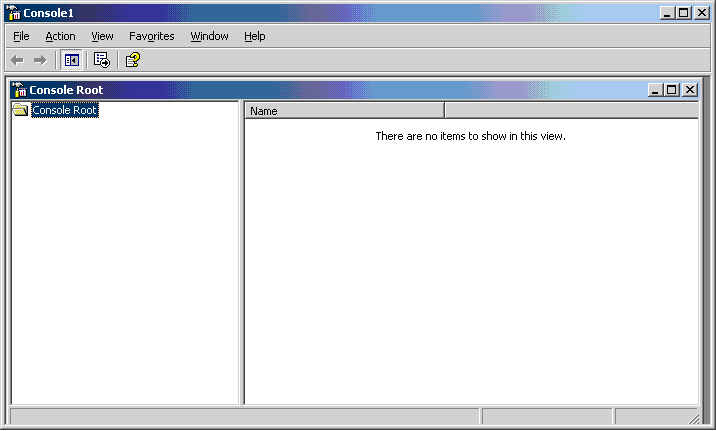
- From the Menu Bar of Microsoft Management Console choose File then select Add/Remove Snap In.
- The
Add/Remove Snap-Indialog window will appear. - Select the Standalone tab.
- In the
Add/Remove Snap-Indialog window click on the Add... button.
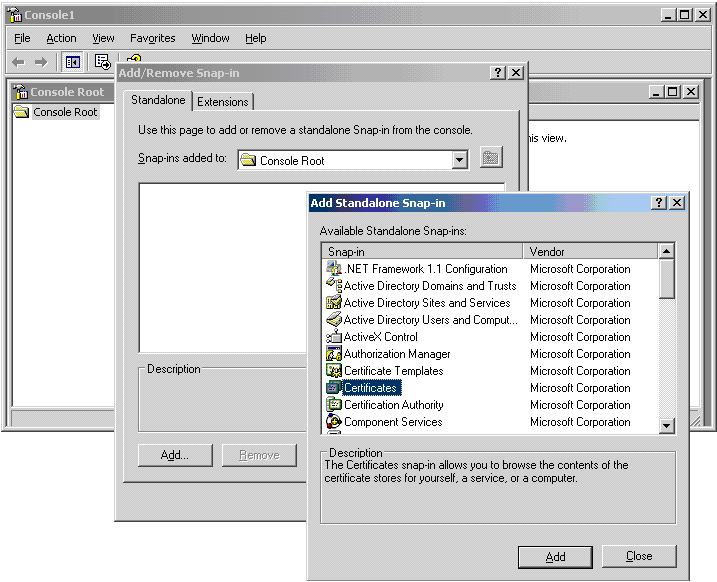
- The Add Standalone Snap-In dialog will appear.
- Highlight Certificates in the
Standalone Snap-Inwindow and then press on the Add button. - The
Certificates snap-inwizard will appear. - Choose the Computer account radio button.
- Click Next.
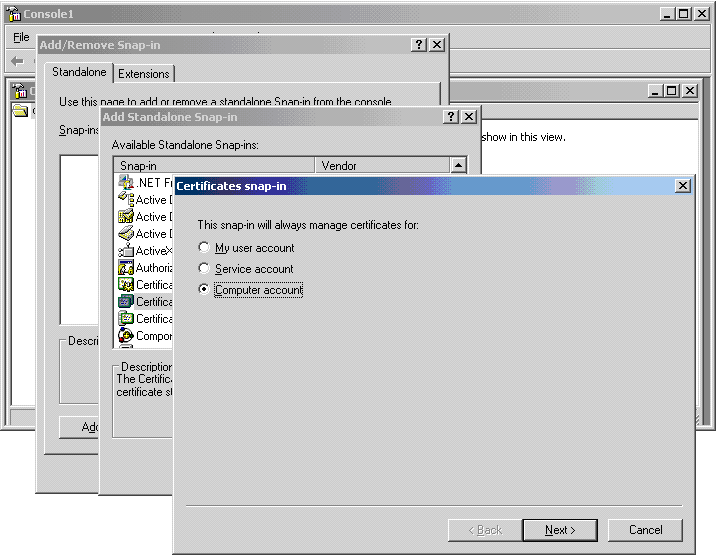
- The
Select Computerwizard will appear. - Choose the Local Computer: radio button.
- Click Next.
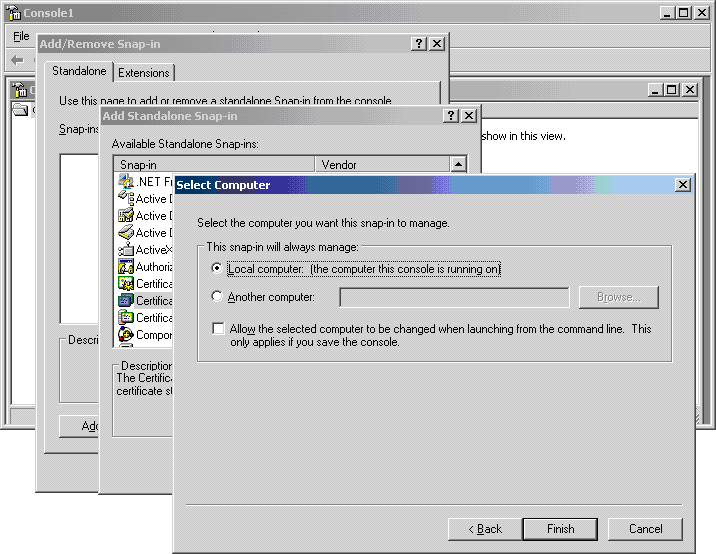
- Click Finish.
- Click Close.
- Click OK.
- Get back to the Microsoft Management Console with the Certificates added.
- Expand Certificates (Local Computer).
- Expand the branch named Personal, and then the Certificates branch of Personal.
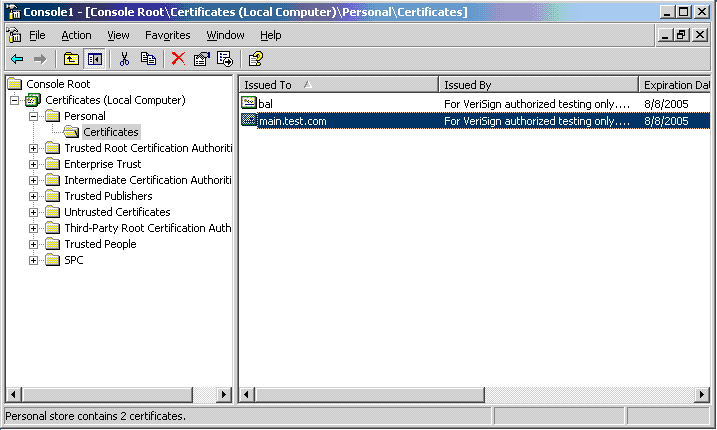
- Right click on Certificates.
- Choose All Tasks from the top of the menu.
- Then select Import….
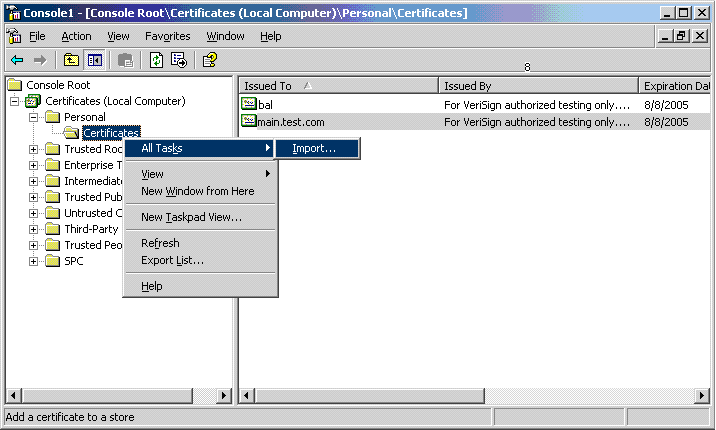
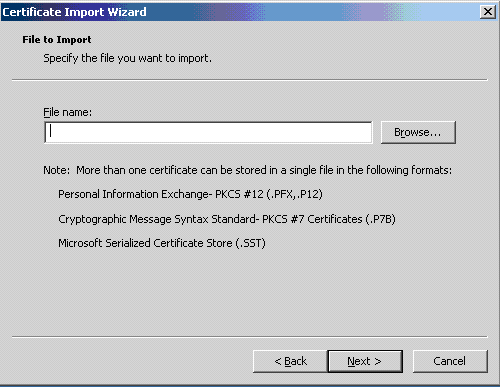
- The Certificate Import Wizard will appear.
- Click Next.
- In the File name: field enter the folder and name of the
.pfxfile that was exported from IIS. - Use the Browse... button to avoid typing mistakes.
- Click Next.
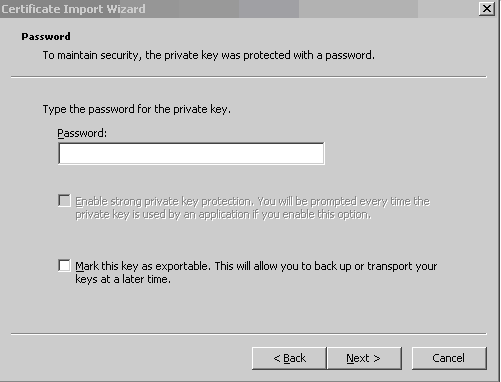
- In the Password: field type in the password for the private key.
- This is the password used to create the certificate on the IIS server for the very first time.
- If the password is lost or forgotten, then the certificate has to be created from the beginnning.
- Passwords are not need for exporting, only for creation.
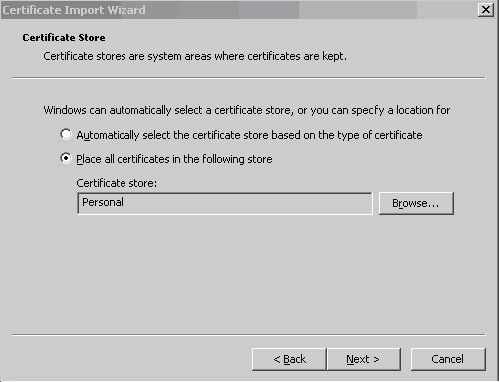
- Select the Place all certificates in the following store radio button.
- Click Next.
- Click Finish.
Congratulations! You have successfully exported a certificate from IIS 6.0 and imported it into ISA Server 2004.